
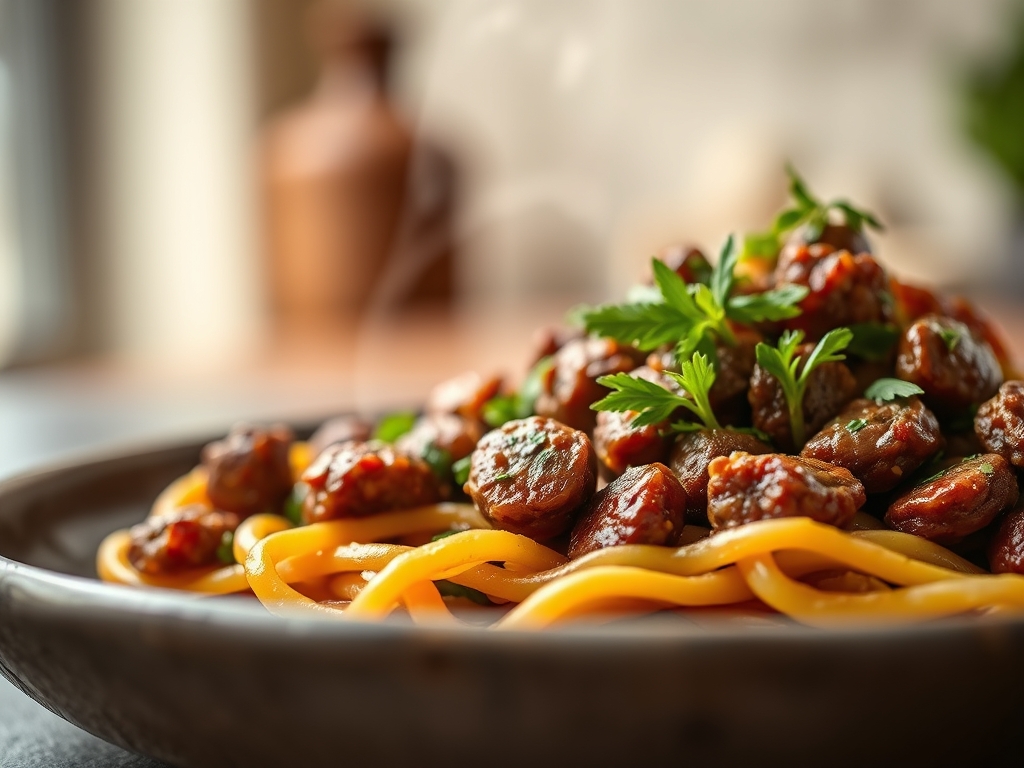
Imagine the scent of toasted fennel seeds colliding with the deep, iron rich aroma of searing protein. When you master italian sausage and ground beef recipes, you are not just cooking dinner; you are conducting a symphony of fats and spices. The sausage provides a complex profile of anise and heat, while the beef offers a robust, structural foundation.
The magic happens in the rendering. As the pork fat liquefies, it coats the lean beef fibers, preventing them from becoming desiccated during high heat applications. This partnership is the backbone of Italian American comfort food, transforming a standard meat sauce or loaf into something far more sophisticated. We are looking for that perfect ratio where the piquant notes of the sausage brighten the earthy depth of the beef. Whether you are folding these into a silky ragu or shaping them into charred, juicy patties, the chemistry of this blend is undeniable. Let us get into the kitchen and explore how to manipulate these proteins like a professional chef, ensuring every bite is a masterclass in texture and flavor.
The Gathers:
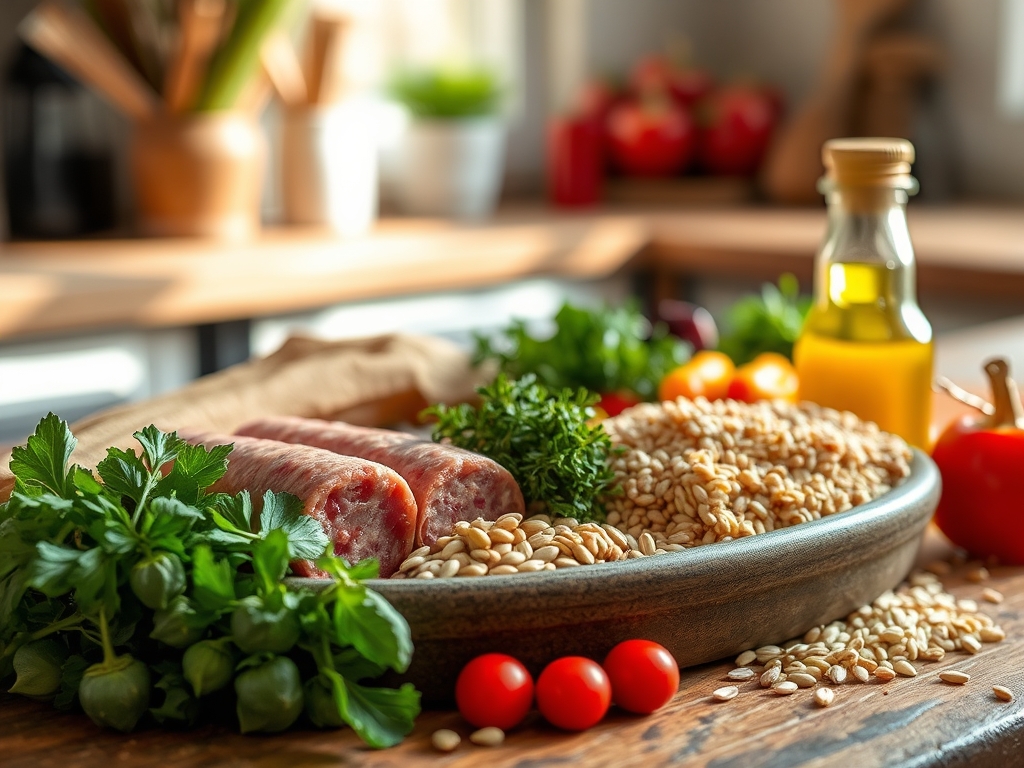
To achieve the best results, your mise en place must be precise. Start with a 1:1 ratio of high quality Italian sausage (removed from the casings) and 80/20 ground beef. The 20 percent fat content in the beef is non negotiable; it ensures the final product remains moist through the emulsification process. You will also need a heavy bottomed skillet, preferably cast iron or stainless steel, to facilitate superior heat distribution.
Your aromatics are equally vital. Gather fresh garlic, yellow onions for their high sugar content (essential for caramelization), and a bunch of flat leaf parsley. For the liquids, have a dry red wine like Chianti on hand to deglaze the pan and a bottle of high quality olive oil. If you are looking for smart substitutions, you can swap the beef for ground bison to increase the iron density, or use spicy chorizo instead of Italian sausage for a smoky, Iberian twist. Always use a digital scale to measure your proteins; precision here ensures that your seasoning ratios remain consistent across every batch you prepare.
The Clock
Efficiency in the kitchen is about understanding the "Chef's Flow." This is the sequence of operations that minimizes downtime and maximizes flavor development. For most italian sausage and ground beef recipes, you are looking at a 15 minute prep window followed by a 30 to 45 minute cook time.
The flow begins with the cold prep: dicing your mirepoix and mincing garlic with a sharp chef's knife. While you chop, your skillet should be preheating over medium high heat. This overlap ensures that the moment your knife hits the board for the last time, the pan is at the optimal temperature for the Maillard reaction. Remember that the sausage takes slightly longer to render its fat than the beef takes to brown. By staggering your entry points, you ensure neither protein overcooks. Total active time is minimal, but the passive simmering time is where the collagen breaks down into gelatin, creating that sought after viscous mouthfeel.
The Masterclass:
1. Temper and Prep the Proteins
Remove your meats from the refrigerator 20 minutes before cooking. Bringing the protein closer to room temperature prevents the pan temperature from crashing, which would cause the meat to steam in its own juices rather than sear. Use a bench scraper to portion the meat into manageable chunks.
Pro Tip: This process minimizes the thermal shock to the muscle fibers. When cold meat hits a hot pan, the fibers contract violently, squeezing out moisture. Tempering ensures a more tender finished texture.
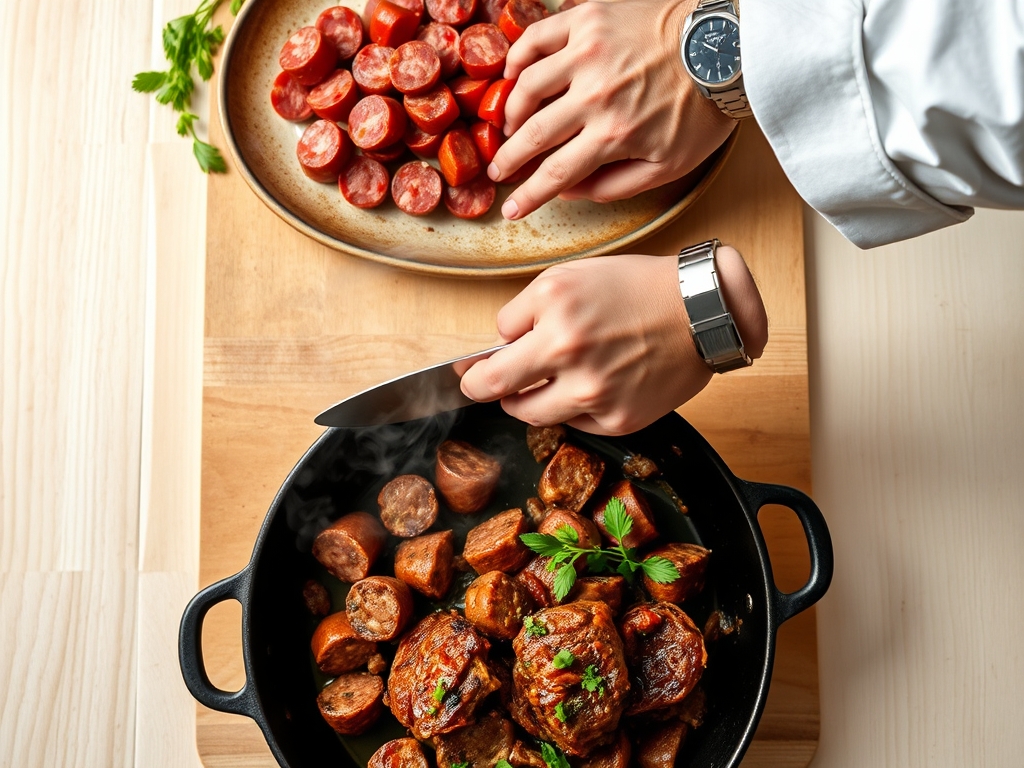
2. The Initial Sear
Place the sausage in a dry, heavy bottomed skillet first. Use a stiff wooden spoon or a meat masher to break it into small crumbles. Once the sausage begins to render its translucent fat, add the ground beef. Do not overcrowd the pan; work in batches if necessary to maintain a high surface temperature.
Pro Tip: This is the Maillard reaction in action. The amino acids and reducing sugars react under high heat to create hundreds of different flavor compounds. If the pan is too crowded, the moisture cannot evaporate, and you lose that golden brown crust.
3. Aromatics and Infusion
Once the meat is browned, push it to the perimeter of the pan, creating a "well" in the center. Add your diced onions and celery here, using the rendered fat as your cooking medium. Use a microplane to zest in fresh garlic at the very end to prevent the delicate oils from burning and becoming bitter.
Pro Tip: This technique is called "blooming." By heating the aromatics in the fat, you are extracting fat soluble flavor compounds that would otherwise remain trapped in the plant cells, resulting in a deeper flavor profile.
4. Deglazing the Fond
You will notice brown bits stuck to the bottom of the pan; this is "fond," and it is concentrated flavor gold. Pour in half a cup of dry wine or beef stock. Use your spoon to scrape the bottom of the pan vigorously until it is clean and the liquid has slightly thickened.
Pro Tip: Deglazing uses a solvent (liquid) to dissolve the caramelized proteins. This creates a complex base for your sauce and ensures that no flavor is wasted. It also stops the browning process before the sugars burn.
5. The Low and Slow Simmer
Add your tomato base or stock and reduce the heat to a low simmer. This is where you add your hardy herbs like rosemary or thyme. Cover the pan partially to allow for slight evaporation, which concentrates the flavors over time.
Pro Tip: This stage facilitates the breakdown of connective tissues. Even in ground meat, there are small amounts of collagen that, when heated slowly in a moist environment, transform into gelatin. This gives your sauce a silky, professional finish.
6. The Final Emulsification
Before serving, check the consistency. If the sauce is too thin, let it reduce further. If it is too thick, add a splash of pasta water. The starches in the pasta water act as a bridge between the fats and the liquids, creating a cohesive, velvety sauce that clings to your noodles.
Pro Tip: This is known as mechanical emulsification. The starch molecules surround the fat droplets, preventing them from coalescing and separating, which ensures your dish doesn't look oily on the plate.
The Deep Dive
From a nutritional standpoint, this blend is a powerhouse of B vitamins, zinc, and high quality protein. A standard serving provides roughly 25 grams of protein, making it an excellent choice for muscle recovery. For those following a Keto lifestyle, this mix is a dream; simply omit the pasta and serve over roasted cabbage or zoodles. If you are Gluten Free, ensure your sausage does not contain breadcrumb fillers.
Even experts run into trouble sometimes. If your meat tastes "gray" or boiled, it is likely because the pan wasn't hot enough or you added salt too early, which draws out moisture. To fix this, turn up the heat and let the liquid evaporate until the searing begins. If the sauce is too acidic, a tiny pinch of baking soda can neutralize the pH levels instantly. For meal prep, remember that flavors actually develop further in the fridge. When reheating, add a tablespoon of water and cover tightly to create steam; this prevents the fats from oxidizing and becoming "warmed over" in flavor.
The Wrap-Up
Mastering the blend of Italian sausage and ground beef is a fundamental skill that elevates your home cooking from basic to "bistro quality" instantly. It is all about respecting the ingredients and understanding the physics of the pan. Once you have the technique down, you can pivot from lasagnas to stuffed peppers with total confidence. So, grab your favorite skillet, turn up the heat, and let the science of flavor do the heavy lifting for you. You have got this!
The Kitchen Table
How do I prevent my meat blend from being too greasy?
Drain the excess fat after the initial browning stage but before adding your aromatics. Leave about one tablespoon of rendered fat in the pan to sauté your vegetables; this preserves the flavor without the heavy, oily mouthfeel in the final dish.
Can I freeze the cooked sausage and beef mixture?
Yes, this blend freezes beautifully. Allow the mixture to cool completely to room temperature before transferring it to an airtight, freezer safe bag. Press the air out to prevent freezer burn; it will stay fresh for up to three months.
What is the best way to break up the meat finely?
Use a stiff whisk or a dedicated potato masher directly in the skillet while the meat is browning. This mechanical agitation breaks the protein bonds before they set, resulting in a uniform, fine crumble that incorporates perfectly into sauces and fillings.
Should I salt the meat before it goes into the pan?
Wait until the meat has browned to add salt. Salting raw ground meat can draw out moisture prematurely, leading to a steaming effect rather than a sear. Seasoning at the end allows you to account for the salt already in the sausage.