
Close your eyes and listen for that specific, aggressive sizzle that happens the moment cold protein hits a shimmering layer of fat. It is the sound of transformation. We have all been there; staring at a pack of bland breasts and wondering how to turn them into good chicken recipes that actually excite the palate rather than just filling a caloric void. The difference between a rubbery, sad Tuesday night meal and a restaurant-quality masterpiece is not magic. It is pure chemistry. We are talking about the Maillard reaction, moisture retention, and the art of the pan sauce. Today, we are stripping away the fluff and focusing on the technical maneuvers that elevate poultry from a utilitarian staple to a culinary event. Whether you are searing, roasting, or braising, these eight pillars of preparation will ensure your kitchen smells like a professional bistro. Get ready to master the nuances of heat and fat as we redefine what home cooking looks like.
The Gathers:
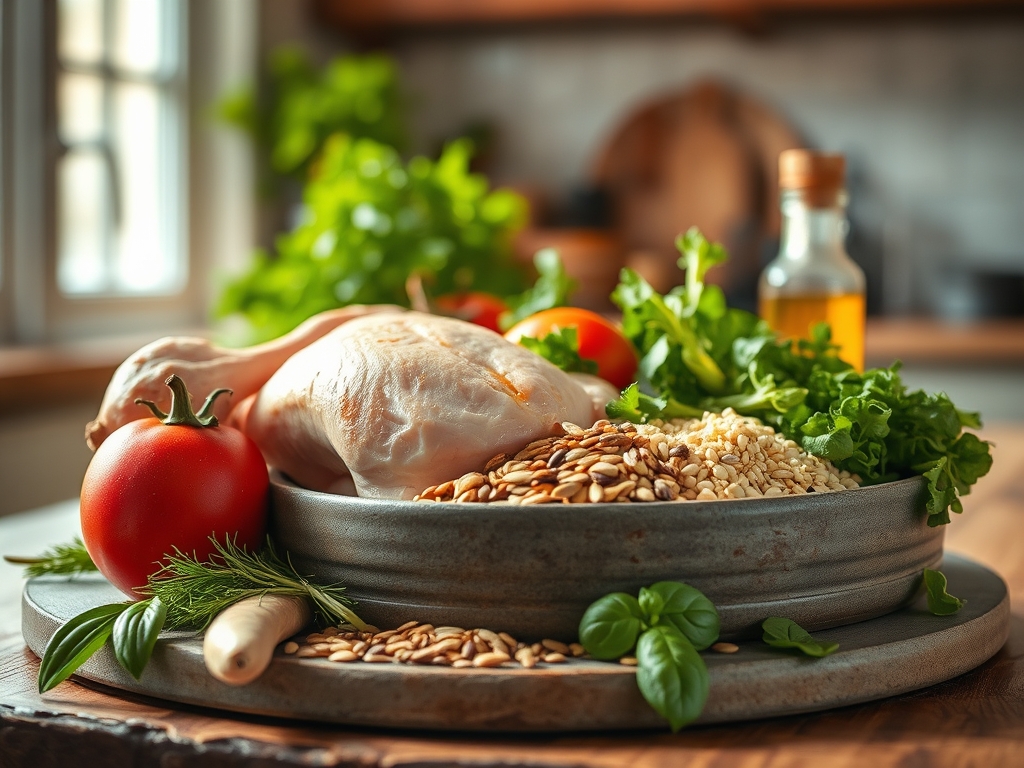
Before the heat even touches the pan, your success is determined by your mise-en-place. You need a heavy-bottomed skillet (cast iron or stainless steel) to ensure even heat distribution and prevent hot spots that scorch delicate proteins. Gather your aromatics: garlic cloves, shallots, and woody herbs like thyme or rosemary. These contain essential oils that will infuse your cooking fat. For the liquid components, have a high-quality chicken stock and a dry white wine ready for when you need to deglaze.
Smart Substitutions: If you lack fresh shallots, use the white parts of green onions for a similar piquant profile. If you are avoiding alcohol, a splash of verjus or a teaspoon of apple cider vinegar diluted in stock provides the necessary acidity to cut through the richness of the rendered fat. Always use a digital scale for your dry rubs; consistency is the hallmark of a professional.
The Clock: Chef's Flow
Timing is the invisible ingredient in all good chicken recipes. Total preparation usually takes 15 minutes of active knife work, while cooking ranges from 12 minutes for a pan-sear to 45 minutes for a bone-in roast. The "Chef's Flow" dictates that you prep your vegetables while the chicken is tempering on the counter. Never cook meat straight from the fridge; allowing it to sit for 20 minutes ensures the muscle fibers do not contract violently when hitting the pan, which prevents toughness.
The Masterclass:
1. The Dry Brine Technique
Salt your chicken at least 30 minutes before cooking. This process allows the salt to penetrate the deep tissue, denaturing the proteins so they can hold onto more water during the cooking process.
Pro Tip: This is known as osmosis followed by diffusion. Initially, salt draws moisture out, but eventually, that salty brine is reabsorbed into the meat, seasoning it from the inside out and breaking down tough fibers.
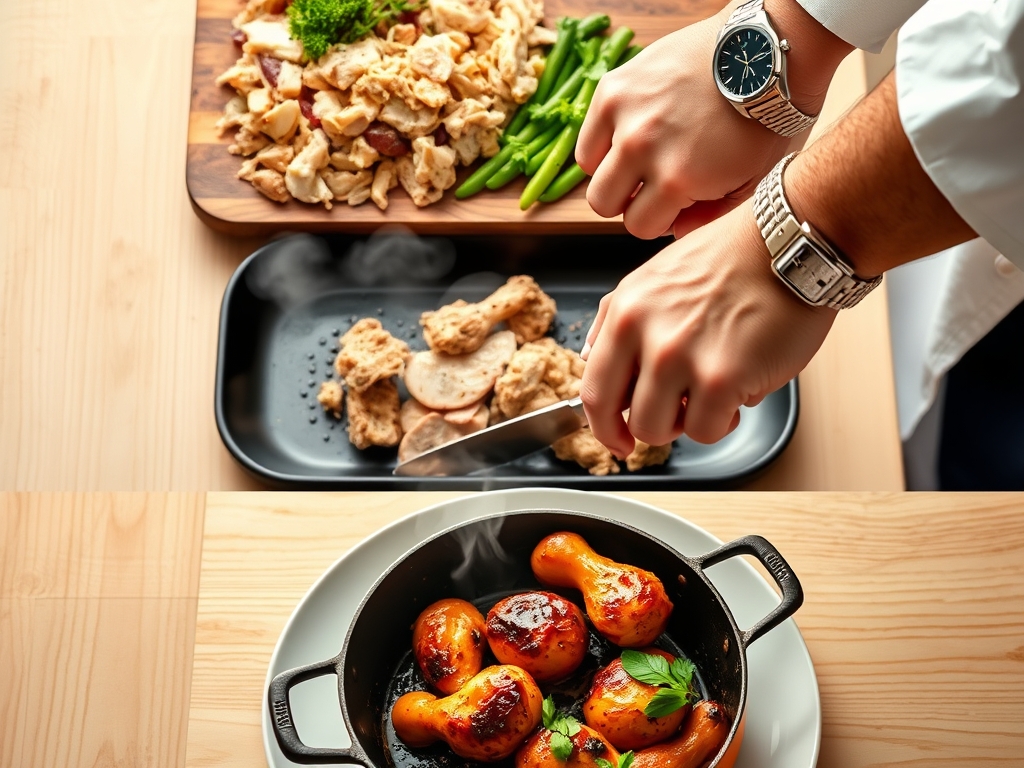
2. Achieving the Perfect Sear
Pat the skin or surface bone-dry with paper towels. Any residual moisture will create steam, which is the enemy of a golden-brown crust. Use a high-smoke-point oil like avocado or grapeseed oil in your heavy-bottomed skillet.
Pro Tip: The Maillard reaction occurs between 285 and 330 degrees Fahrenheit. If your pan is too crowded, the temperature drops and the meat will "stew" in its own juices rather than browning.
3. The Art of Fond and Deglazing
Once the chicken is removed, do not wash the pan. Those brown bits stuck to the bottom are called fond. Pour in your wine or stock and use a wooden spoon to scrape them up.
Pro Tip: This is a chemical extraction of concentrated flavors. The liquid acts as a solvent, lifting the caramelized proteins and sugars to create a complex, savory base for your sauce.
4. Mounting the Sauce (Pan Sauce 101)
Reduce your deglazing liquid by half, then whisk in cold butter or a splash of heavy cream. Use a saucier if you have one for better whisking angles.
Pro Tip: This is emulsification. The fats in the butter bind with the water-based stock to create a viscous, glossy coating. Cold butter is essential because it melts slowly, allowing the milk solids to stabilize the sauce.
5. Using a Meat Thermometer
Stop guessing. Use a digital instant-read thermometer to pull your chicken at 160 degrees Fahrenheit.
Pro Tip: Thermal carryover will continue to raise the internal temperature by 5 degrees while the meat rests. Pulling at 160 ensures you hit the safe 165 mark without overcooking the delicate proteins into sawdust.
6. Aromatics and Basting
In the final two minutes of cooking, add butter, smashed garlic, and thyme to the pan. Tilt the pan and use a large spoon to continuously pour the foaming butter over the chicken.
Pro Tip: This is known as arroser. The hot fat acts as a finishing heat source while the aromatics infuse the exterior with deep, nutty flavors.
7. The Resting Period
Place your chicken on a warm plate and wait at least 5 to 10 minutes before slicing. Use a bench scraper to move the meat without losing the crust.
Pro Tip: Resting allows the internal pressure to drop, letting the juices redistribute from the center back to the edges. If you cut too soon, the juice ends up on the cutting board instead of in your mouth.
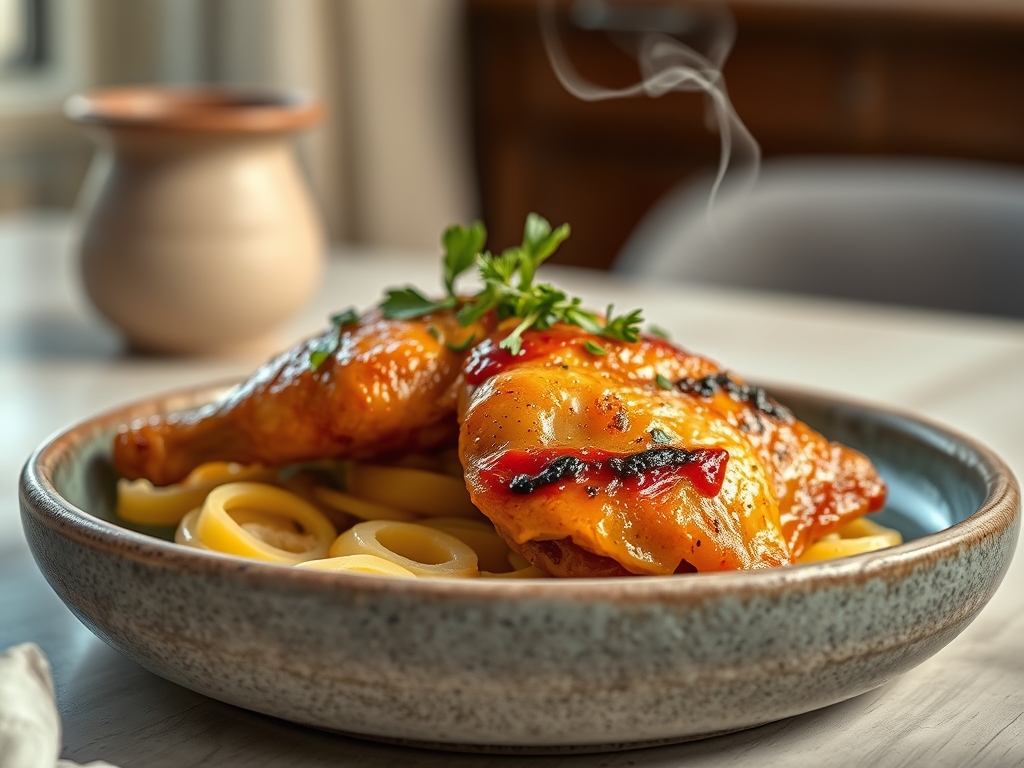
8. Acidic Finishing
Just before serving, use a microplane to zest fresh lemon over the dish or add a tiny drop of high-quality vinegar.
Pro Tip: Acid acts as a flavor brightener. It balances the heavy fats and salts, "waking up" the taste buds and highlighting the subtle sweetness of the roasted meat.
The Deep Dive
Macro Nutrition: Chicken is a lean protein powerhouse. A standard 6-ounce serving provides roughly 50 grams of protein with minimal saturated fat, making it an ideal vehicle for healthy fats like olive oil or avocado.
Dietary Swaps: For a Keto version, lean heavily into the butter basting and pan sauces. For a Vegan alternative, these same techniques (searing and deglazing) work wonders on thick "steaks" of cauliflower or oyster mushrooms. For Gluten-Free diners, ensure your stock is certified and use cornstarch or a cold butter mount instead of a flour-based roux.
The Fix-It:
- Dry Meat: You overshot the temperature. Next time, use the thermometer and pull earlier. For now, slice it thin and submerge it in a warm pan sauce to rehydrate.
- Soggy Skin: The pan wasn't hot enough or was overcrowded. Use a wire rack next time to allow air circulation.
- Broken Sauce: If your sauce looks oily, it "split." Add a teaspoon of warm water and whisk vigorously to re-emulsify.
Meal Prep: To reheat chicken without the "leftover" taste, avoid the microwave. Use a low oven (300 degrees) with a splash of water or stock in the dish, covered tightly with foil to create a steam chamber.
The Wrap-Up
Mastering good chicken recipes is about respecting the physics of the kitchen. When you understand how heat interacts with moisture and how acid balances fat, you stop following recipes and start creating experiences. Use your tongs with confidence, keep your heavy-bottomed skillet hot, and never underestimate the power of a five-minute rest. You have the tools and the science; now go turn that bird into a masterpiece.
The Kitchen Table
How do I get crispy chicken skin every time?
Dry the skin thoroughly with paper towels and leave it uncovered in the fridge for two hours. Use a high-smoke-point oil in a preheated cast-iron pan and avoid moving the chicken until it naturally releases from the surface.
Why is my chicken breast always dry?
You are likely overcooking it. Chicken breast lacks the collagen of thighs, so it dries out quickly. Use a digital thermometer to pull the meat at 160 degrees Fahrenheit and let it rest for five minutes to finish.
Can I make a pan sauce without wine?
Yes. Use a high-quality chicken bone broth with a squeeze of lemon or a teaspoon of white wine vinegar. The goal is to provide acidity to balance the savory fond and the richness of the finishing butter.
What is the best oil for searing chicken?
Use oils with high smoke points like avocado, grapeseed, or refined light olive oil. Avoid extra virgin olive oil or butter for the initial sear, as they will burn and become bitter at high temperatures.