
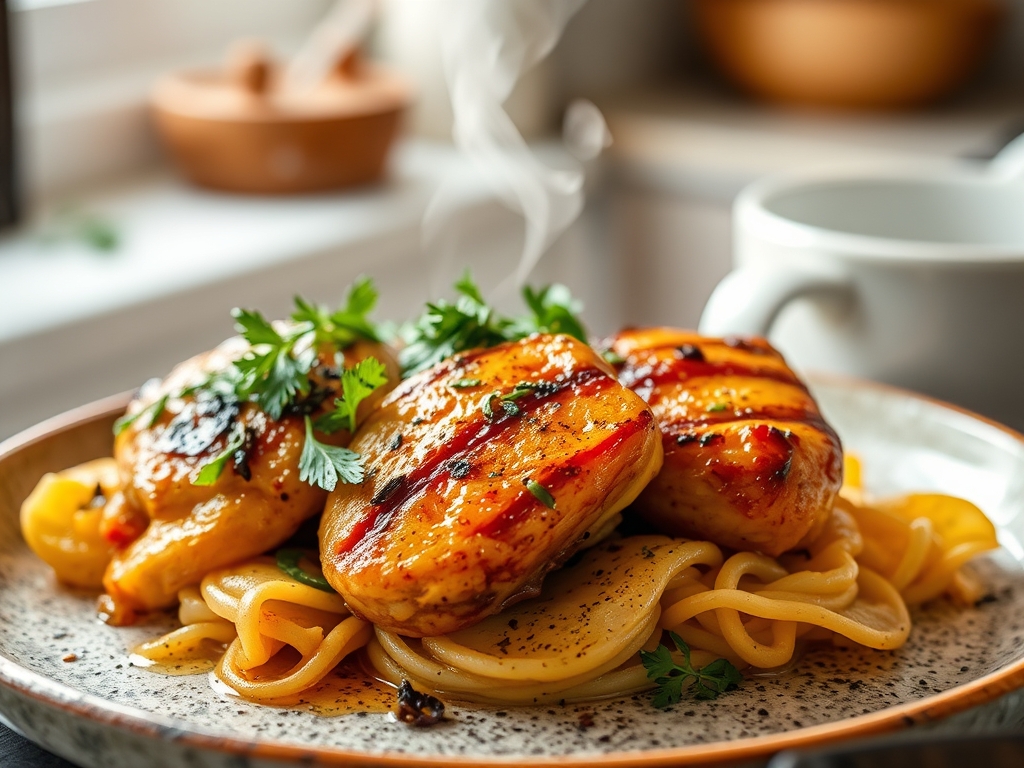
Picture this: a heavy-bottomed skillet sizzling on the stovetop while the air fills with the piquant aroma of toasted garlic and bright citrus. We have all been there, staring at a pack of bland breasts and wondering how to transform them into something spectacular without sacrificing our wellness goals. Finding the healthiest chicken recipes does not mean settling for dry, flavorless protein; it means mastering the molecular magic of moisture retention and spice infusion. Whether you are a seasoned meal prepper or a weeknight warrior, the secret lies in balancing high-heat searing with delicate, nutrient-dense glazes. We are moving beyond the basic "boiled bird" era and into a world where healthy eating feels like a decadent indulgence. By understanding how heat interacts with amino acids, you can create a crust that rivals any restaurant dish while keeping the interior succulent and lean. Today, we are diving deep into eight transformative techniques that will turn your kitchen into a high-performance laboratory of flavor. Get your digital scale ready, because we are about to redefine what clean eating looks like.
The Gathers:
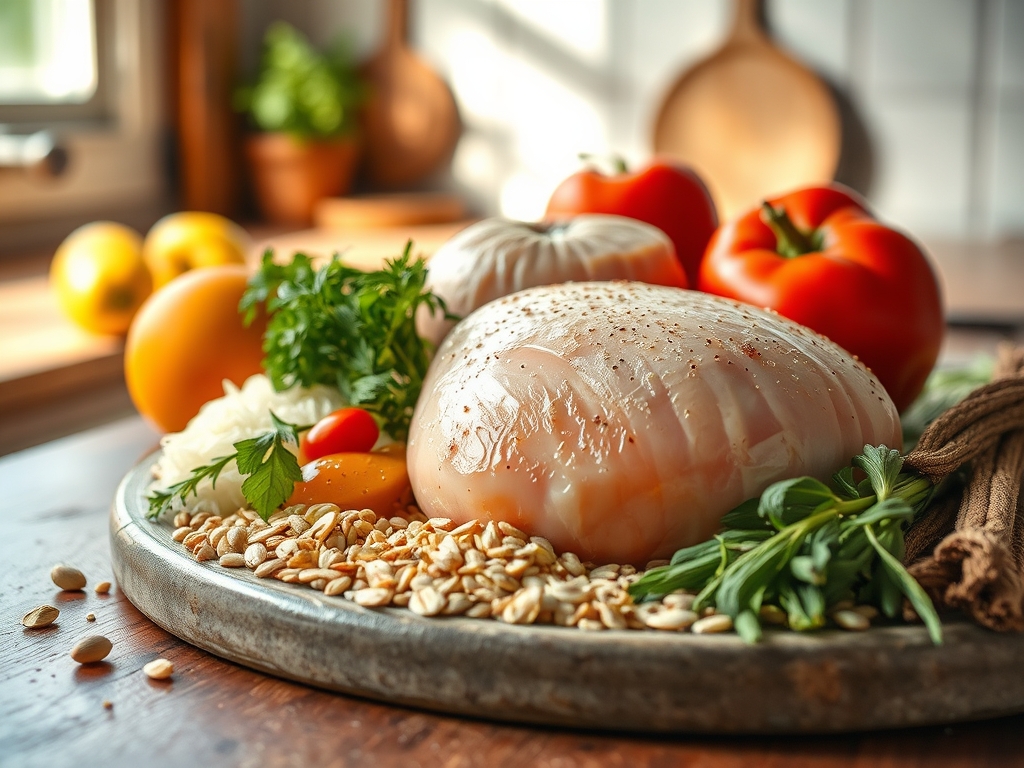
The foundation of the healthiest chicken recipes starts with a pristine mise-en-place. To achieve professional results, you need ingredients that offer maximum impact with minimal caloric density. Start with organic, air-chilled chicken breasts or thighs; air-chilling prevents the meat from absorbing excess water, ensuring a better sear. You will also need high-smoke-point fats like avocado oil or ghee to facilitate the Maillard reaction without breaking down into acrid compounds.
For the flavor profile, gather fresh aromatics: ginger, garlic, and shallots. Use a microplane to zest lemons and limes, which provides an intense citrus punch without the acidity of the juice curdling your sauces. Your pantry should include low-sodium tamari or liquid aminos for a hit of umami, and raw honey or maple syrup to help with caramelization.
Smart Substitutions:
If you are watching your sodium, swap traditional salt for nutritional yeast to add a nutty, savory depth. Instead of heavy cream, use a splash of full-fat coconut milk or a dollop of Greek yogurt to create a viscous, creamy texture. If you need to thicken a sauce, reach for an arrowroot slurry instead of a flour-based roux to keep the dish gluten-free and light.
The Clock:
Efficiency in the kitchen is all about the "Chef's Flow." For these recipes, expect a total active prep time of 15 minutes and a cook time of 12 to 18 minutes depending on the thickness of your protein. The total "floor-to-table" time sits comfortably at 30 minutes.
The flow begins with the "Chill Break." Take your chicken out of the refrigerator 20 minutes before cooking to take the chill off; this ensures the muscle fibers do not seize up when they hit the hot pan. While the protein tempers, use a bench scraper to organize your chopped aromatics. The goal is to have every component ready before the first drop of oil hits the skillet, as the cooking process moves rapidly once the heat is applied.
The Masterclass:
1. The Surface Prep
Pat the chicken dry with paper towels until the surface is completely matte. Moisture is the enemy of a good crust because it creates steam, which prevents the meat from browning. Use your digital scale to portion out 6-ounce servings for precision.
Pro Tip: This process facilitates enzymatic browning. When the surface is dry, the heat can immediately begin breaking down sugars and proteins into hundreds of different flavor compounds rather than wasting energy evaporating surface water.
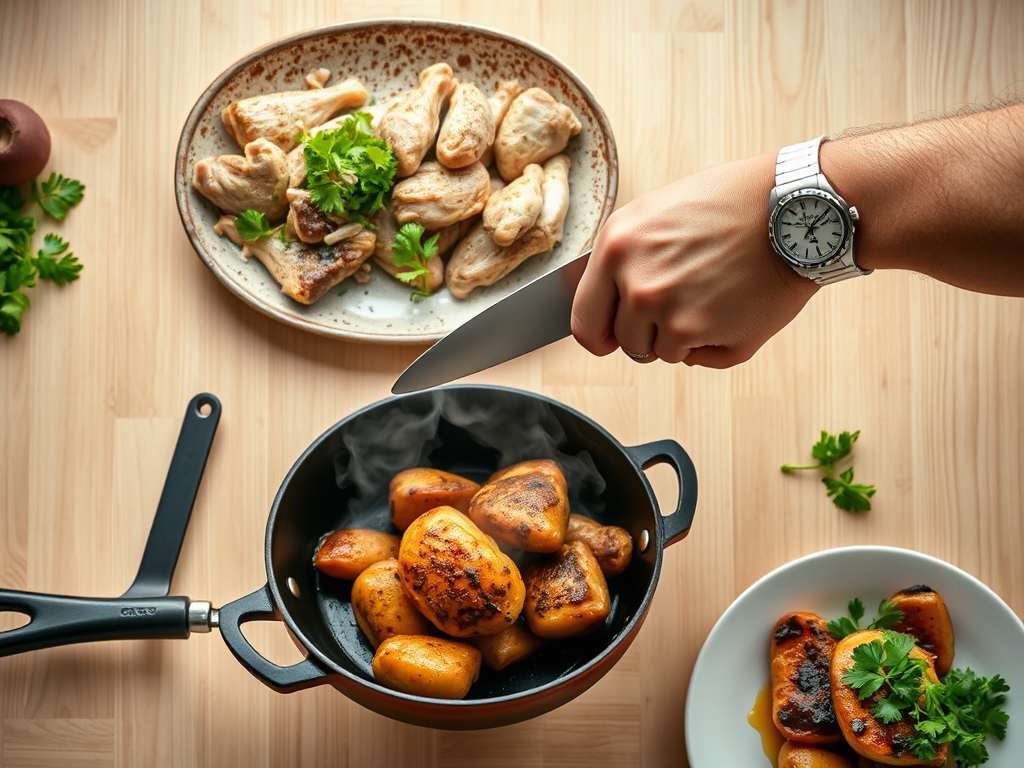
2. The Initial Sear
Heat your heavy-bottomed skillet over medium-high heat until a drop of water flicked onto the surface dances and evaporates instantly. Add your fat and wait for it to shimmer. Lay the chicken away from you to avoid oil splatter.
Pro Tip: Resist the urge to move the meat. This is called protein bonding. If you try to flip it too early, the meat will tear. Once a golden-brown crust has formed, the chicken will "release" itself from the pan naturally.
3. The Aromatics Infusion
Once you flip the chicken, toss in your smashed garlic cloves and fresh herbs. Use tongs to move the aromatics around the edges of the chicken so they flavor the oil without burning.
Pro Tip: This is known as fat-soluble flavor extraction. Many of the aromatic compounds in garlic and rosemary are only released in fat, not water, so infusing the oil ensures the flavor permeates every bite.
4. The Deglaze
Pour a splash of chicken bone broth or white wine into the pan. Use a wooden spoon to scrape up the brown bits stuck to the bottom. These bits, known as the fond, are concentrated flavor gold.
Pro Tip: This step utilizes deglazing to create a pan sauce. The liquid dissolves the caramelized proteins, incorporating them back into a sauce that coats the chicken without the need for heavy butter or cream.
5. The Rest and Carryover
Remove the chicken from the pan when it reaches 160 degrees Fahrenheit on an instant-read thermometer. Transfer it to a warm plate and tent it loosely with foil for five minutes.
Pro Tip: This accounts for thermal carryover. The internal temperature will continue to rise to the safe 165 degrees Fahrenheit while the juices redistribute. Cutting it immediately causes the liquid to leak out, resulting in a dry, chalky texture.
The Deep Dive:
When we look at the macro nutrition of these healthiest chicken recipes, we are aiming for a high protein-to-calorie ratio. A standard 6-ounce serving provides roughly 40 grams of protein and only 6 grams of fat. This makes it an ideal staple for muscle recovery and metabolic health.
Dietary Swaps:
For a Keto version, increase the healthy fats by finishing the sauce with a tablespoon of grass-fed butter. For a Vegan alternative, this exact searing and deglazing method works beautifully with extra-firm tofu or thick cauliflower steaks. If you are strictly Gluten-Free, ensure your broth is certified and use tamari instead of soy sauce.
The Fix-It:
- Rubbery Texture: This usually happens from overcooking. Use a thermometer every time; 165 degrees is the limit, not the suggestion.
- Bland Flavor: You likely forgot to season the "layers." Salt the raw meat, salt the aromatics, and season the final sauce.
- Burnt Garlic: If your garlic turns bitter, you added it too early. Always add delicate aromatics after the initial sear is complete.
Meal Prep Science:
To maintain "day-one" quality when reheating, use the low and slow method. Reheat chicken in a covered dish with a tablespoon of water at 300 degrees Fahrenheit. This creates a mini-steam chamber that prevents the proteins from tightening and becoming "woody" in the microwave.
The Wrap-Up:
Mastering the healthiest chicken recipes is less about following a strict list of ingredients and more about respecting the physics of the kitchen. By focusing on surface moisture, temperature control, and the art of the deglaze, you can turn a simple protein into a culinary masterpiece. Remember that healthy food should never feel like a compromise; it should feel like the ultimate fuel for your vibrant life. Now, grab your saucier, fire up the range, and let the sizzle begin. Your best-ever dinner is only twenty minutes away!
The Kitchen Table:
How do I keep chicken breast from getting dry?
Use an instant-read thermometer to pull the chicken at 160 degrees Fahrenheit. Allow it to rest for five minutes; the internal temperature will rise to 165 degrees via carryover heat, ensuring the juices stay locked within the muscle fibers.
What is the best oil for healthy searing?
Avocado oil is the superior choice for high-heat cooking. It has a high smoke point of 520 degrees Fahrenheit, which prevents the oil from oxidizing and creating free radicals, keeping your meal both delicious and heart-healthy.
Can I make these recipes in an air fryer?
Yes, you can adapt these for an air fryer by preheating the unit to 400 degrees Fahrenheit. Lightly coat the chicken in oil to facilitate the Maillard reaction, then cook for 10 to 12 minutes until the internal temperature is safe.
How long does cooked chicken stay fresh in the fridge?
Properly stored in an airtight glass container, cooked chicken remains at peak quality for three to four days. For the best texture, ensure the chicken has cooled completely before sealing the lid to prevent excess condensation and sogginess.