
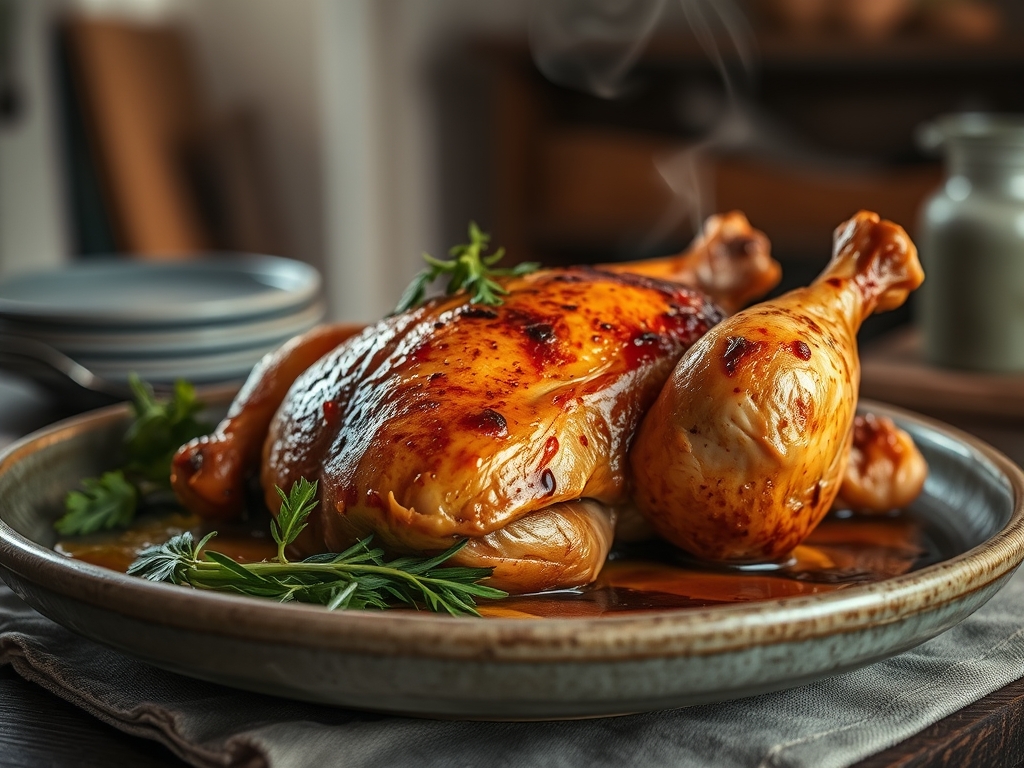
The scent of rendered fat hitting a hot roasting pan is a universal love language. There is something deeply primal about a bird bronzing under high heat; the skin transitioning from translucent to a shatteringly crisp, golden amber. While the internet is flooded with oven whole chicken recipes, most fall short because they ignore the fundamental physics of poultry. We are not just cooking dinner; we are managing moisture migration and heat transfer to ensure the breast stays succulent while the dark meat reaches its tender, collagen-melting peak.
If you have ever pulled a bird from the oven only to find the skin flaccid or the meat dry, take heart. We are going to master the architecture of the roast. By understanding how heat penetrates muscle fibers and how salt restructures proteins, you will transform a humble grocery store bird into a centerpiece that commands the room. Put on your favorite apron and grab your digital scale; we are about to dive into the molecular magic that makes a roast chicken truly legendary.
The Gathers:
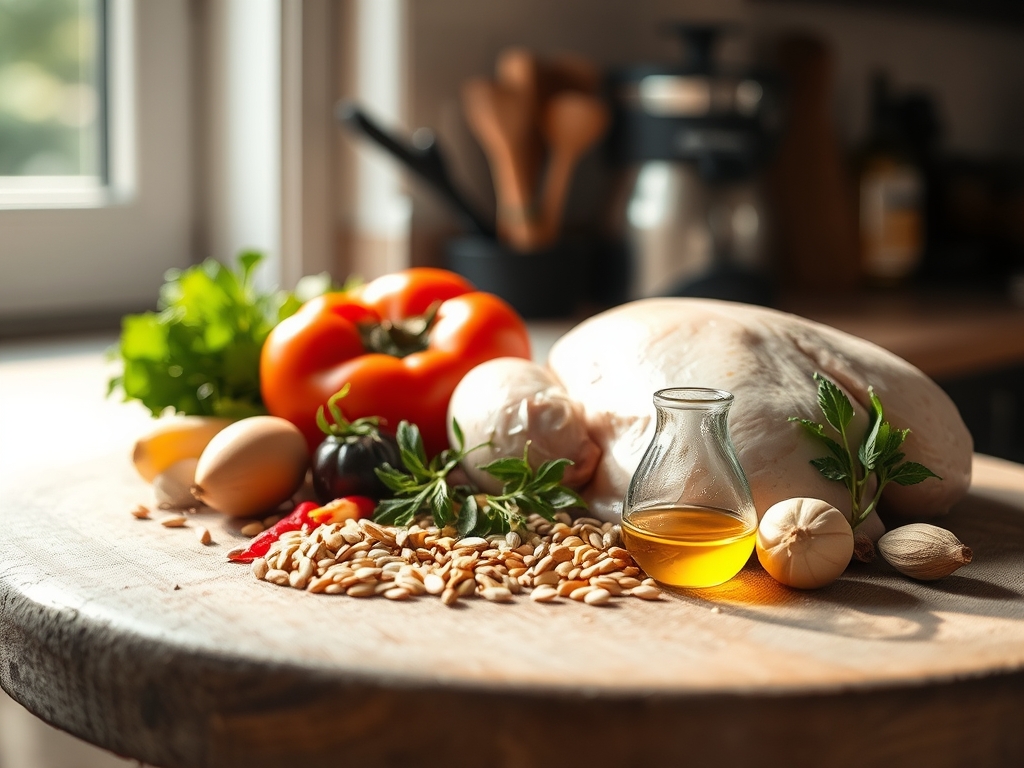
Your mise-en-place is the foundation of your success. Start with a four to five pound bird, preferably air-chilled to avoid the excess water weight that plagues conventional poultry. For the aromatics, gather a head of garlic sliced crosswise to expose the cloves, a handful of woody herbs like rosemary and thyme, and a lemon for its bright, piquant acidity. You will also need high-quality unsalted butter or avocado oil; the latter has a higher smoke point which is vital for high-heat roasting.
Smart Substitutions: If you are out of fresh lemons, a teaspoon of sumac offers a similar citrusy punch. No fresh herbs? Use a dry rub of smoked paprika and toasted cumin to create a crust that is rich in earthy depth. If you prefer a dairy-free approach, duck fat is a superior alternative to butter for achieving that coveted glass-like skin texture.
The Clock:
Mastering the "Chef's Flow" is about timing your movements so nothing feels rushed. Your total active prep time is approximately twenty minutes, but the real work happens during the "dry brine" phase, which should ideally last between four and twenty-four hours. This allows the salt to penetrate deep into the muscle tissue via osmosis.
The actual roasting time fluctuates based on the weight of the bird, but generally requires sixty to seventy-five minutes at 425 degrees Fahrenheit. Finally, the most critical window is the twenty-minute rest period. This is not just a suggestion; it is the time required for the internal juices to redistribute. If you carve too early, the moisture will evacuate onto your cutting board, leaving the meat parched.
The Masterclass:
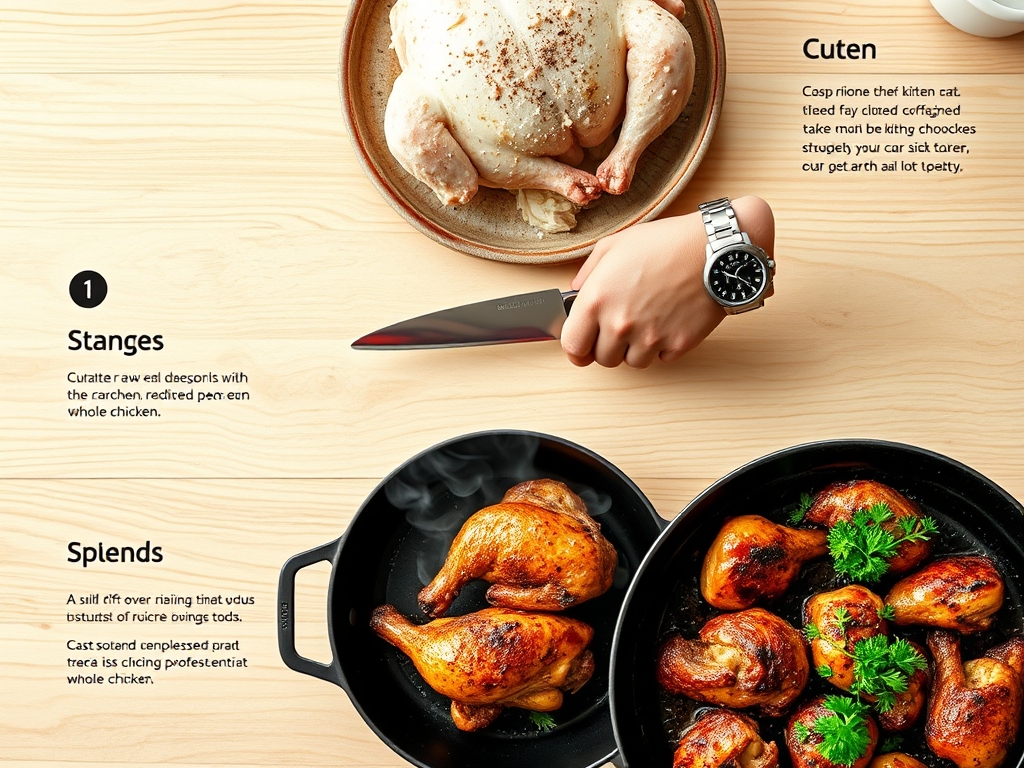
1. The Surface Preparation
Remove the chicken from its packaging and pat it dry with paper towels until the skin feels like parchment. Moisture is the enemy of the Maillard reaction; if the skin is damp, the oven's energy will be wasted evaporating water rather than browning the surface.
Pro Tip: This is known as hygroscopic management. By removing surface moisture, you ensure that the heat immediately begins to render the subcutaneous fat, leading to a crispier result.
2. The Strategic Salt
Generously season the bird inside and out with kosher salt. Use your fingers to loosen the skin over the breast and thighs, tucking salt and herb butter directly onto the meat. Use a microplane to zest lemon over the skin for an aromatic lift.
Pro Tip: Salt acts as a protein denaturant. It breaks down the tight structures of the muscle fibers, allowing them to hold onto more water during the high-heat cooking process.
3. The Trussing Technique
Using kitchen twine, tie the legs together and tuck the wingtips behind the back. This creates a compact, uniform shape that prevents the extremities from burning before the core is cooked.
Pro Tip: Trussing reduces the surface area-to-volume ratio. This slows down the cooking of the delicate breast meat, allowing it to finish at the same time as the more resilient thighs.
4. The High-Heat Launch
Place the bird in a heavy-bottomed skillet or a dedicated roasting pan. Slide it into a preheated 425 degree oven. The high initial heat triggers the Maillard reaction, a chemical dance between amino acids and reducing sugars that creates hundreds of flavor compounds.
Pro Tip: Using a cast iron skillet provides excellent conductive heat, crisping the bottom of the bird while the ambient oven air provides convective heat for the top.
5. The Thermal Check
Around the forty-five minute mark, use a digital probe thermometer to check the thickest part of the thigh. You are looking for 160 degrees Fahrenheit.
Pro Tip: Remember thermal carryover. The internal temperature will continue to rise by five to ten degrees after the bird is removed from the oven due to the residual heat trapped in the outer layers of the meat.
6. The Rest and Deglaze
Transfer the chicken to a warm platter. While it rests, place your roasting pan over a burner. Add a splash of white wine or stock and use a bench scraper or whisk to loosen the browned bits (the fond).
Pro Tip: This process is called deglazing. The fond is a concentrated source of umami that, when emulsified with a pat of cold butter in a saucier, creates a world-class pan sauce.
The Deep Dive:
From a nutritional standpoint, a whole roast chicken is a powerhouse of lean protein and essential minerals like selenium and phosphorus. A standard four-ounce serving provides roughly 25 grams of protein. For those following a Keto lifestyle, this is a perfect foundational meal; simply increase the healthy fats by serving it with a buttery herb sauce. Vegan guests can enjoy the same aromatic profile by roasting cauliflower "steaks" using the same herb and lemon rub.
The Fix-It:
- Soggy Bottom: If the underside of your bird is wet, roast it on a wire rack set inside the pan to allow air to circulate completely around the chicken.
- Burnt Aromatics: If your garlic or lemons are scorching, add them to the pan halfway through the cooking time rather than at the start.
- Dry Breast Meat: If the breast is cooking too fast, cover it loosely with a small "tent" of aluminum foil to deflect some of the direct heat.
Meal Prep Science: To reheat leftovers without that "warmed-over" flavor, avoid the microwave. The microwave vibrates water molecules too violently, toughening the proteins. Instead, place slices in a skillet with a tablespoon of water and cover with a lid. This uses gentle steam to rehydrate the fibers, maintaining a "day-one" quality.
The Wrap-Up:
You now hold the keys to the kingdom of oven whole chicken recipes. By respecting the science of heat and the biology of the bird, you have moved beyond following a list of steps to truly understanding the "why" behind the "how." Whether it is a quiet Tuesday or a festive Sunday, a perfectly roasted chicken is the ultimate culinary flex. It is sophisticated yet soulful; scientific yet deeply personal. Now, grab your tongs, carve with confidence, and enjoy the fruits of your labor!
The Kitchen Table:
How do I get the crispiest skin on my chicken?
The secret is air-drying. Salt the bird and leave it uncovered in the refrigerator for at least four hours. This removes surface moisture, allowing the fat to render quickly and the skin to crisp rather than steam.
What temperature is a whole chicken safely cooked?
While the USDA recommends 165 degrees Fahrenheit, you should pull the bird at 160 degrees. Carryover cooking will bring the internal temperature up to the safe 165-degree mark while the meat rests on the counter.
Should I roast chicken covered or uncovered?
Always roast uncovered. Covering the bird traps steam, which results in rubbery, pale skin. An open environment allows for the Maillard reaction and evaporation, which are essential for developing a deep brown color and concentrated flavor.
Can I roast a chicken directly from the freezer?
It is not recommended. For even heat penetration, the chicken must be fully thawed. Roasting a frozen bird leads to an overcooked exterior and a raw, dangerous center. Always thaw safely in the refrigerator for 24 hours.