
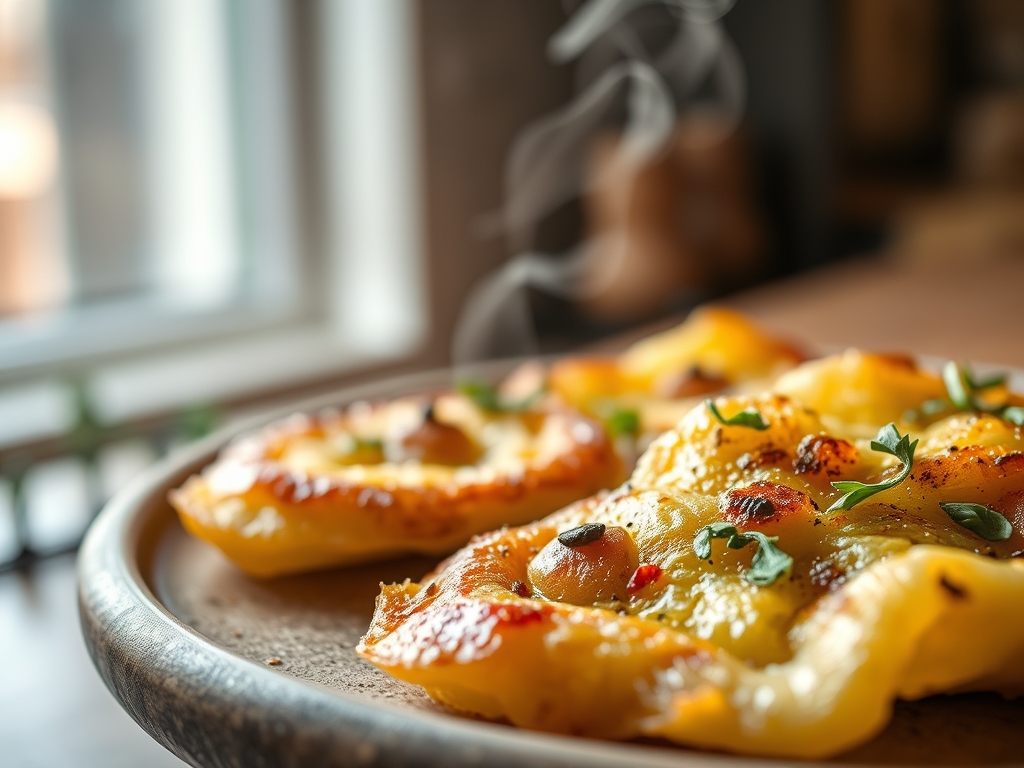
Imagine the sound of a heavy blade slicing through a cold, starchy tuber; it is a crisp, rhythmic snap that promises something spectacular. When you are hunting for the ultimate potato recipes rosti, you are not just looking for a side dish; you are seeking a masterclass in texture. We are talking about a golden, shatteringly crisp exterior that yields to a center so creamy it feels like a culinary velvet. This is the Swiss national treasure reimagined through the lens of modern food science. Most people settle for soggy, grey shredded spuds, but you are my friend, and I refuse to let you live that way. We are going to harness the power of starch gelatinization and moisture management to create a disc of pure gold. This journey requires a bit of wit and a lot of heat, but the result is a sensory explosion that turns a humble root vegetable into a high-end gastronomic event.
The Gathers:
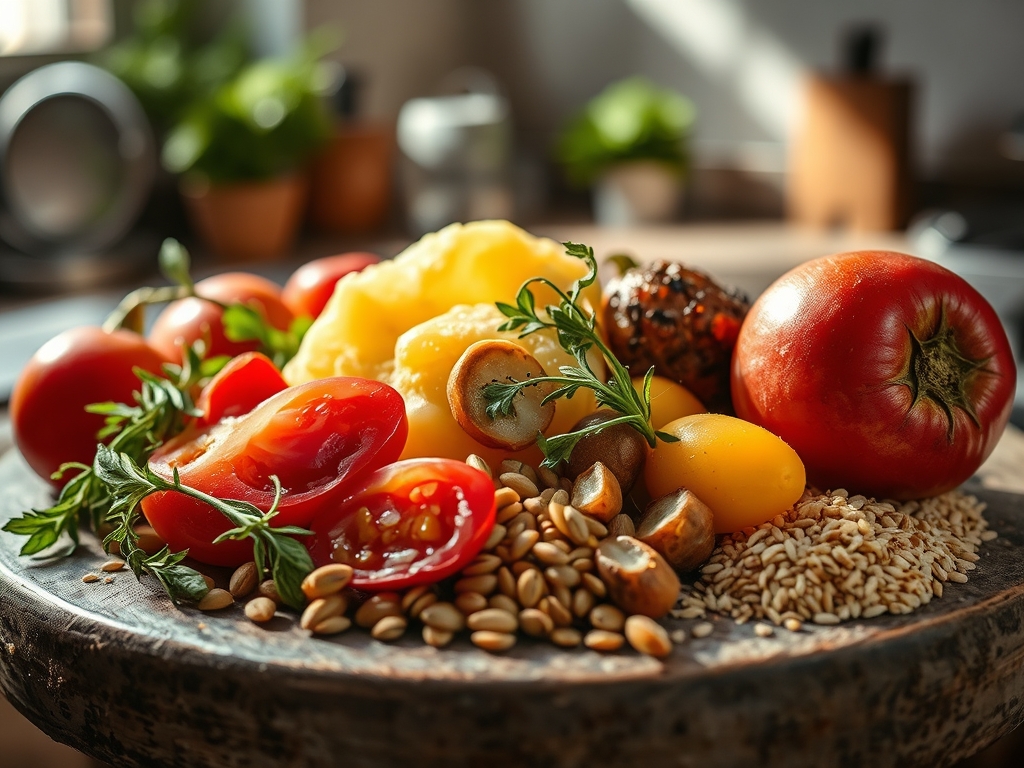
To achieve the perfect potato recipes rosti, your mise-en-place must be precise. Start with high-starch Russet potatoes. Their low moisture content and high amylose levels are non-negotiable for that structural integrity. You will also need high-quality clarified butter, also known as ghee. Unlike standard butter, ghee has the milk solids removed, giving it a smoke point of 485 degrees Fahrenheit. This allows for intense Maillard browning without the bitter notes of burnt protein.
Gather your professional tools: a heavy-bottomed skillet (cast iron or carbon steel is preferred for thermal mass), a box grater with large apertures, and a digital scale to ensure your ratios are exact. You will also need fine sea salt to draw out moisture and a touch of white pepper for a piquant bite that does not mar the visual aesthetic with black flecks.
Smart Substitutions: If you cannot find Russets, Yukon Golds offer a more viscous, buttery interior but require a longer "squeeze" phase to manage their higher water content. For a dairy-free version, use duck fat or avocado oil. Duck fat is particularly effective as it contains saturated fats that help the exterior render into a glass-like crust.
The Clock
Efficiency in the kitchen is about the Chef's Flow. Expect about 15 minutes of active preparation, which includes peeling, grating, and the crucial moisture extraction. The cooking phase takes approximately 20 to 25 minutes. You will spend 10 to 12 minutes per side over medium-high heat. Do not rush this. The goal is to allow the heat to penetrate the center, hydrating the starch granules until they swell and burst, creating that mashed-potato interior, while the exterior undergoes a slow, even caramelization.
The Masterclass
1. The Grate Debate
Use the largest holes on your box grater to create long, thick strands. Short, thin shreds will turn into a homogenous mush rather than a textured cake.
Pro Tip: This prevents enzymatic browning. By grating directly into a bowl of cold, acidified water (add a splash of lemon juice), you stop the polyphenol oxidase from reacting with oxygen, keeping your potatoes snowy white.
2. The Great Squeeze
Place your shredded potatoes in a clean lint-free kitchen towel or cheesecloth. Twist and wring with all your might. You want to extract every drop of liquid.
Pro Tip: Reducing water content is vital for thermal efficiency. Water evaporates at 212 degrees Fahrenheit, but the Maillard reaction needs temperatures above 300 degrees. If the potatoes are wet, they will steam rather than fry.
3. Seasoning and Aeration
Toss the dry shreds with salt and pepper in a large bowl. Use your fingers to aerate the mixture, ensuring the strands are not clumped together.
Pro Tip: Salt acts as a hygroscopic agent, drawing out deep-seated cellular moisture. Doing this right before cooking ensures the salt seasons the starch without making the potatoes weep too much in the pan.
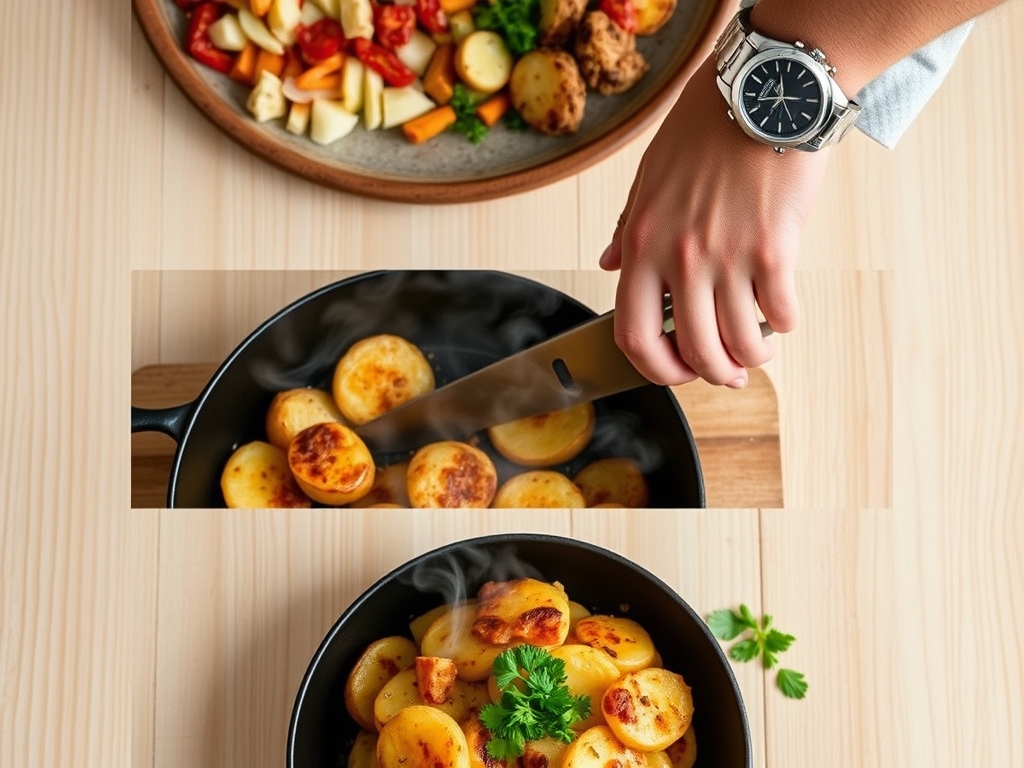
4. The Initial Sear
Heat two tablespoons of ghee in your heavy-bottomed skillet until it shimmers. Add the potatoes, spreading them evenly but do not press down yet.
Pro Tip: This allows for steam venting. If you compress the potatoes immediately, the internal steam cannot escape, leading to a dense, gummy center. Let them breathe for the first two minutes.
5. The Compression
After the initial sear, use a bench scraper or a flat spatula to gently press the edges into a neat circle. Press the top down firmly to encourage the strands to knit together.
Pro Tip: This creates structural lamination. The starch released during the heating process acts as a natural glue, bonding the strands into a singular, flippable unit.
6. The Flip
Once the bottom is deep mahogany, slide the rosti onto a flat plate. Invert the skillet over the plate and flip the whole assembly over.
Pro Tip: Use tongs to tuck in any stray strands. This technique minimizes heat loss and prevents the cake from breaking, maintaining the integrity of the crust.
7. The Butter Baste
Add another tablespoon of ghee around the edges of the pan. Swirl it so it migrates under the rosti.
Pro Tip: This is called infusing the crumb. The fat seeps into the nooks and crannies, ensuring the second side achieves the same level of crispness as the first.
8. The Finishing Touch
Lower the heat slightly and cook for another 8 to 10 minutes. Use a digital thermometer to check the center; it should read at least 205 degrees Fahrenheit.
Pro Tip: This ensures starch gelatinization. At this temperature, the amylopectin bonds have fully softened, resulting in that signature melt-in-the-mouth texture.
The Deep Dive
From a macro nutrition perspective, a potato rosti is a powerhouse of complex carbohydrates and potassium. To keep it lighter, focus on the quality of fat rather than the quantity. For a Keto version, you can substitute 50 percent of the potato with shredded daikon radish or cauliflower, though the "crunch factor" will vary. For a Vegan approach, refined coconut oil provides the necessary saturated fat for a crisp finish without the coconut flavor.
The Fix-It: Common Pitfalls
- The Rosti Falls Apart: This usually means there was too much moisture or not enough pressure. Next time, squeeze harder and ensure the pan is hot enough to "set" the starch immediately.
- Burnt Outside, Raw Inside: Your heat is too high. Use a heat diffuser if your stove runs hot, and remember that the second side usually cooks faster because the pan is already saturated with heat.
- Greasy Texture: This happens if the oil temperature drops too low. Ensure the fat is shimmering before the potatoes hit the pan to create an immediate sear that blocks excess oil absorption.
Meal Prep and Reheating: To maintain "day-one" quality, never use a microwave. The microwave agitates water molecules, making the crust soggy. Instead, use a toaster oven or a dry skillet over medium heat to re-crisp the exterior while gently warming the center.
The Wrap-Up
Mastering potato recipes rosti is a rite of passage for any home cook looking to elevate their breakfast or dinner game. It is a dish that rewards patience, precision, and a little bit of scientific curiosity. By controlling moisture and managing heat, you transform a simple starch into a golden crown of culinary delight. Now, grab your skillet, trust the process, and prepare to hear that glorious crunch.
The Kitchen Table
Which potato is best for rosti?
Russet potatoes are the gold standard due to their high starch content. This starch is essential for creating a crisp exterior and a fluffy interior. Avoid waxy red potatoes as they hold too much moisture and will not crisp properly.
Do I need to parboil the potatoes?
Parboiling is optional but recommended for thicker rosti. Boiling the whole potato for 8 minutes before grating ensures the center is fully cooked and creamy by the time the outside reaches a perfect, deep golden brown.
How do I keep the rosti from sticking?
Ensure your skillet is well-seasoned or use a high-quality non-stick pan. The fat must be shimmering hot before adding the potatoes. Do not attempt to flip the rosti until a solid crust has formed on the bottom.
Can I make rosti ahead of time?
Yes, you can fry them until they are lightly golden, then finish them in a hot oven just before serving. This "double-cook" method actually enhances the crispness, making them perfect for dinner parties or holiday brunches.