
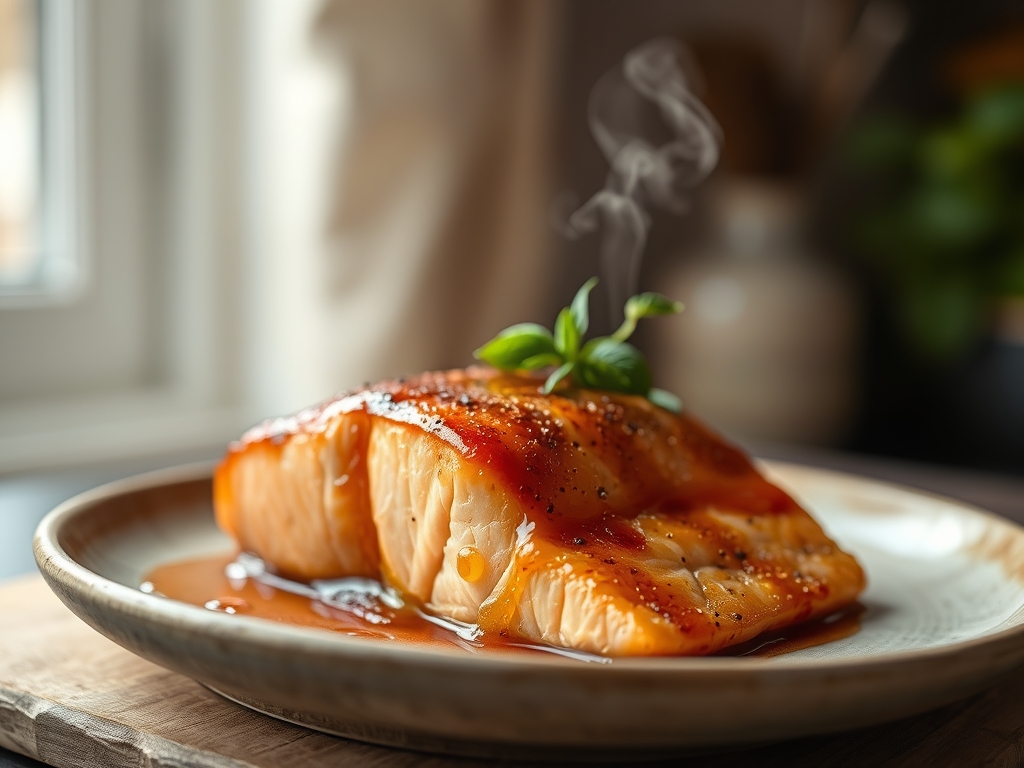
Picture the scene: a heavy-bottomed skillet sizzling on the range while the scent of caramelizing molasses and sea salt fills your kitchen. We are chasing that perfect, glass-like crust that shatters under a fork to reveal buttery, translucent flakes of fish. Mastering brown sugar glazed salmon recipes is not just about following a card; it is about managing the delicate tension between protein coagulation and sugar carbonization. We want that deep, mahogany sheen without crossing the line into a burnt, bitter mess. If you have ever struggled with salmon that is dry in the center or a glaze that runs right off the fillet like water, you are in the right place. We are going to dive deep into the molecular magic of the Maillard reaction and the structural integrity of fats to ensure your next dinner is nothing short of a culinary masterpiece.
The Gathers:
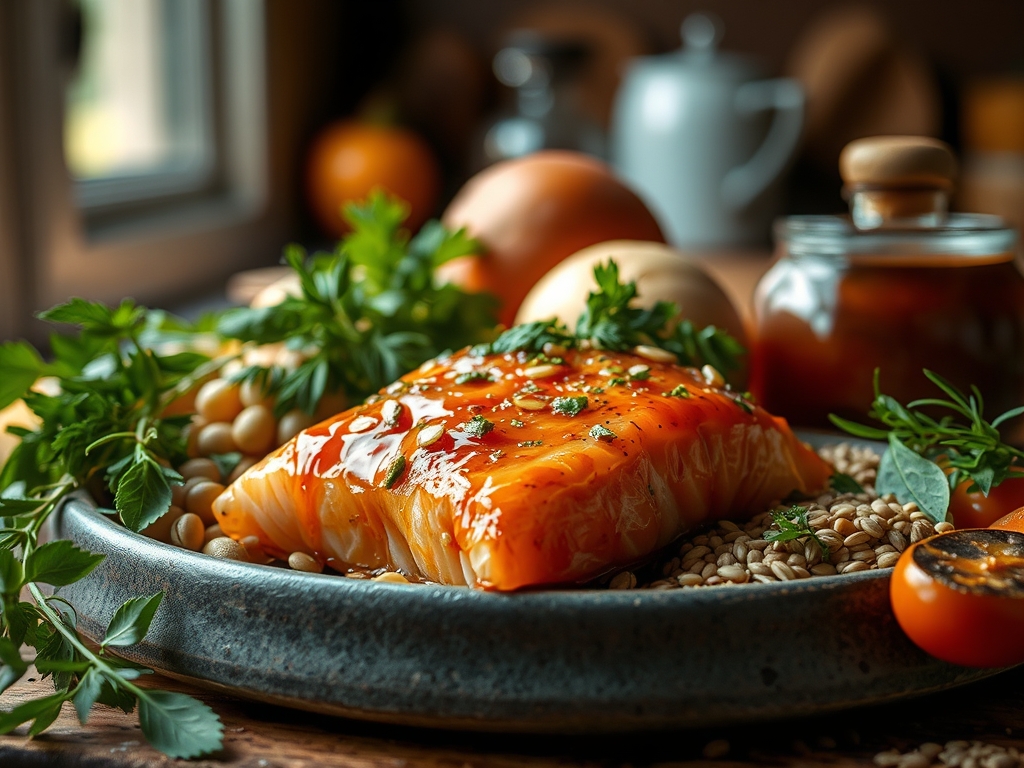
To achieve a restaurant-grade finish, your mise-en-place must be precise. Start with center-cut Atlantic or King salmon fillets; these varieties possess a higher intramuscular fat content which provides a buffer against thermal shock. You will need dark brown sugar for its high moisture content and acidic molasses profile. This acidity is crucial because it reacts with the amino acids in the fish to accelerate browning.
Next, gather your aromatics. Use a microplane to grate fresh ginger and garlic into a fine paste. This increases the surface area, allowing the volatile oils to infuse the glaze without leaving chunky bits that might scorch. For the liquid base, a high-quality tamari or low-sodium soy sauce provides the salinity needed to denature the surface proteins.
Smart Substitutions: If you are watching your glycemic index, coconut sugar offers a similar depth of flavor with a lower burn point. If you lack honey to act as a binder, use maple syrup; however, be aware that maple syrup is less viscous, so you may need to reduce the glaze in a saucier for an extra three minutes to achieve the proper coating consistency.
The Clock
Efficiency in the kitchen is all about the "Chef's Flow." Total active prep time is exactly 10 minutes, while the cooking process spans 12 to 15 minutes depending on the thickness of your fillets.
The flow begins with the "Chill Temper." Remove your salmon from the refrigerator 15 minutes before cooking. If you drop a cold stone of fish into a hot pan, the exterior will overcook before the center even begins to render. Use this window to whisk your glaze and preheat your oven. By the time your digital scale confirms your portions are even, the salmon will be at the ideal temperature for an even sear.
The Masterclass:
1. The Desiccating Pat-Down
Use a lint-free paper towel to aggressively dry the skin and surface of the fish. Moisture is the enemy of the Maillard reaction. If the surface is wet, the energy of the pan goes into evaporating water rather than browning the protein.
Pro Tip: This is known as surface desiccation. By removing water, you allow the sugars and amino acids to reach the 285 degree Fahrenheit threshold required for complex flavor development much faster.
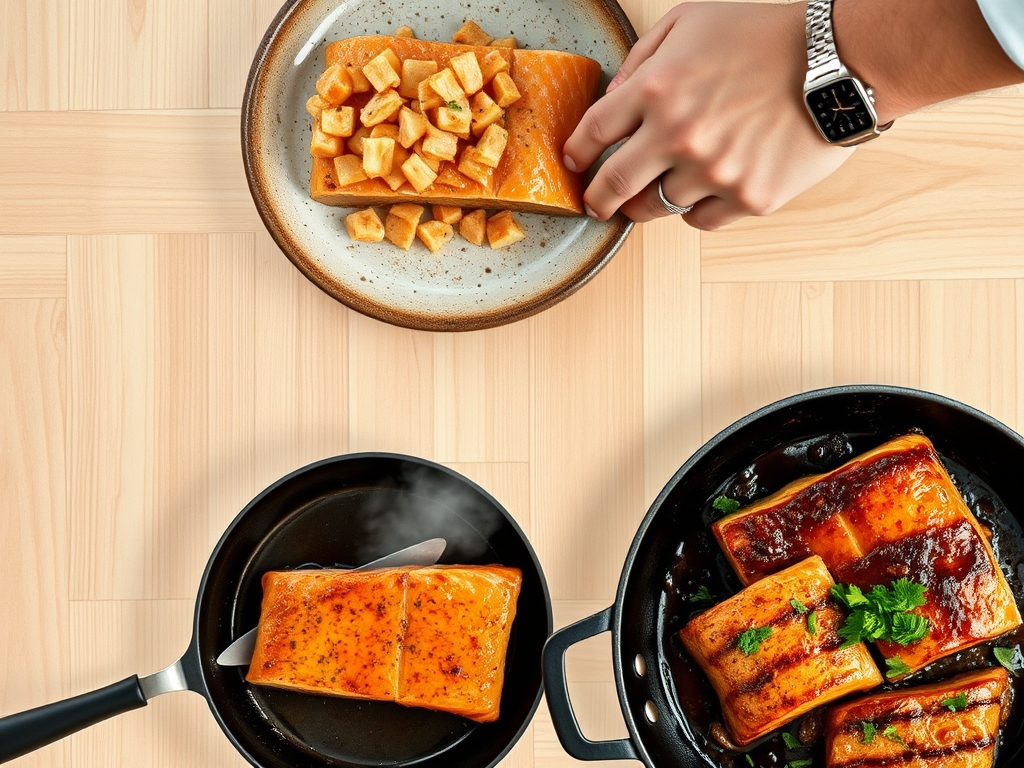
2. The High-Heat Sear
Heat a tablespoon of neutral oil in your skillet until it reaches the shimmering point. Lay the salmon skin-side down using tongs. Press firmly with a bench scraper or spatula for 30 seconds to prevent the skin from curling as the collagen fibers contract.
Pro Tip: This initial sear initiates protein denaturation. By keeping the skin side down first, you create a thermal shield that protects the delicate flesh from toughening.
3. The Glaze Application
Once the skin is crisp, flip the fish and immediately pour your brown sugar mixture into the pan. Use a spoon to deglaze the bottom of the skillet, picking up any fond (the flavorful brown bits) and incorporating them into the sauce.
Pro Tip: The sugars will undergo pyrolysis, creating new aromatic compounds. The "viscous" nature of the sugar creates a coating that traps steam inside the fish, keeping it moist.
4. The Oven Finish
Transfer the skillet to a 400 degree Fahrenheit oven for the final 4 minutes. This provides surround-sound heat that cooks the salmon through without the risk of burning the sugar on the direct heat of the burner.
Pro Tip: Utilize a digital thermometer to pull the fish at 130 degrees Fahrenheit. Thermal carryover will continue to cook the fish as it rests, bringing it to a perfect 135 or 140 degrees.
5. The Rest and Emulsify
Remove the fish to a warm plate. If the sauce in the pan looks broken or oily, whisk in a teaspoon of cold water or butter to aerate and re-emulsify the glaze into a silky ribbon.
Pro Tip: Resting allows the internal juices to redistribute. If you cut into it immediately, the pressure from the contracted muscle fibers will push all the moisture out onto the plate.
The Deep Dive
From a macro perspective, this dish is a powerhouse. A standard 6-ounce fillet provides roughly 34 grams of high-quality protein and is rich in Omega-3 fatty acids, which are essential for cognitive function.
Dietary Swaps: For a Keto-friendly version, replace the brown sugar with a monk fruit gold blend and use liquid aminos. For a vegan "salmon" alternative, use thick slabs of roasted cauliflower or firm tofu, though you will need to double the glaze to account for the lack of natural fats in the substitute.
The Fix-It:
- The Glaze is Too Runny: Your pan wasn't hot enough to reduce the sugars. Remove the fish and boil the sauce solo for 60 seconds until it coats the back of a spoon.
- The Skin is Soggy: You likely flipped too early. The fish will "release" from the pan naturally once the skin has fully crisped.
- The Garlic is Bitter: You added the aromatics too early. Always add garlic and ginger in the final seconds of the stovetop phase to avoid carbonization.
Meal Prep: To reheat without turning your salmon into a rubber tire, avoid the microwave. Instead, place it in a covered pan with a splash of water over low heat. The steam will gently re-hydrate the proteins without tightening the muscle fibers.
The Wrap-Up
There is a profound joy in mastering a dish that feels both indulgent and incredibly nourishing. By understanding the science of heat transfer and the chemistry of sugar, you have transformed a simple piece of seafood into a centerpiece. These brown sugar glazed salmon recipes are your new secret weapon for everything from solo weeknight wins to impressive dinner parties. Now, grab your skillet and go create some magic!
The Kitchen Table
How do I stop the glaze from burning?
Add your glaze during the final minutes of cooking. The high sugar content means it will scorch if exposed to direct heat for too long. Using a heavy-bottomed skillet also helps distribute heat evenly to prevent hot spots.
Can I use light brown sugar instead?
Yes, but you will lose some of the deep, earthy notes found in dark brown sugar. Dark brown sugar contains more molasses, which provides a more piquant flavor profile and a darker, more aesthetic "lacquered" finish on the fish.
Should I leave the skin on?
Absolutely. The skin acts as an insulator, preventing the delicate flesh from overcooking. Even if you do not plan to eat it, cooking with the skin on ensures a much juicier result due to the rendering fats underneath.
How do I know when the salmon is done?
The fish should be opaque and flake easily with a fork. For the most accurate results, use a digital thermometer to reach an internal temperature of 130 degrees Fahrenheit before allowing it to rest and reach final doneness.